Mabon Recipes
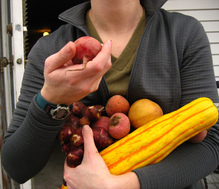
Mabon celebrates the autumn equinox and the harvest. At this time of year, root crops, squashes, and other fall vegetables ripen. Some farmer's markets and roadside stands are closing, but orchards are in their boom season as fall fruits ripen, especially if there is also a pumpkin patch. In many places, hunting seasons begin to open so wild game becomes more readily available. Autumn colors of burgundy, deep orange, gold, and brown abound. For background information and ritual ideas, see our main Mabon page.
Baked Potatoes
Ingredients:
potatoes
olive oil
Vegan/vegetarian toppings: olive oil, margarine, fresh herbs (chives, sage, thyme, etc.), diced vegetables (tomatoes, onions, peppers, etc.), mushroom gravy, all-bean chili, baked beans, salt, pepper.
Dairy toppings: butter, cream, sour cream, cream cheese, grated cheese (gouda, cheddar, swiss, etc.), melted cheese sauce (velveeta, mozzarella, etc.), cheese chili.
Carnivore toppings: bacon bits, beef gravy, beef tips in gravy, loose-fried hamburger, meat chili, sausage chunks.
Directions:
Preheat oven to 450ºF. Brush baking pan or cookie sheet with olive oil.
Scrub the potatoes and pat them dry. With a sharp knife, cut an X into the top of each potato. Brush the entire surface of each potato with olive oil. Place the potatoes in the baking pan and cook for 45-60 minutes. Potatoes are done when they are soft inside; test by pushing a fork into the X cuts.
Remove potatoes from oven and allow to cool for 3-5 minutes. Open the X cuts to expose the potato flesh. Add toppings to taste.
Notes:
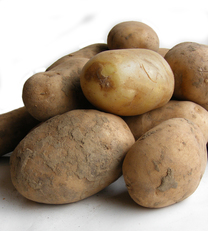
Potatoes are cheap, and nutritious unless you do something like fry them into potato chips. With modest toppings, they are low in calories. With abundant toppings, a baked potato can be a meal in itself, which makes the calorie count reasonable. Baking them without foil, just the oil coating, makes them fluffy rather than mushy or dry. Good potatoes for baking include russet, long white, purple, blue, Yukon Gold, and Idaho potatoes; russets are best.
If you have fancy salts or peppers, this is a good time to use them.
We all put different things on our potatoes: margarine/shredded cheese, margarine/sour cream/shredded cheese, etc. Offering different toppings is an easy way to please several people with divergent tastes.
This recipe was originally published in The Wordsmith's Forge on 4/4/09, then revised for reprint 6/23/11.
potatoes
olive oil
Vegan/vegetarian toppings: olive oil, margarine, fresh herbs (chives, sage, thyme, etc.), diced vegetables (tomatoes, onions, peppers, etc.), mushroom gravy, all-bean chili, baked beans, salt, pepper.
Dairy toppings: butter, cream, sour cream, cream cheese, grated cheese (gouda, cheddar, swiss, etc.), melted cheese sauce (velveeta, mozzarella, etc.), cheese chili.
Carnivore toppings: bacon bits, beef gravy, beef tips in gravy, loose-fried hamburger, meat chili, sausage chunks.
Directions:
Preheat oven to 450ºF. Brush baking pan or cookie sheet with olive oil.
Scrub the potatoes and pat them dry. With a sharp knife, cut an X into the top of each potato. Brush the entire surface of each potato with olive oil. Place the potatoes in the baking pan and cook for 45-60 minutes. Potatoes are done when they are soft inside; test by pushing a fork into the X cuts.
Remove potatoes from oven and allow to cool for 3-5 minutes. Open the X cuts to expose the potato flesh. Add toppings to taste.
Notes:
Potatoes are cheap, and nutritious unless you do something like fry them into potato chips. With modest toppings, they are low in calories. With abundant toppings, a baked potato can be a meal in itself, which makes the calorie count reasonable. Baking them without foil, just the oil coating, makes them fluffy rather than mushy or dry. Good potatoes for baking include russet, long white, purple, blue, Yukon Gold, and Idaho potatoes; russets are best.
If you have fancy salts or peppers, this is a good time to use them.
We all put different things on our potatoes: margarine/shredded cheese, margarine/sour cream/shredded cheese, etc. Offering different toppings is an easy way to please several people with divergent tastes.
This recipe was originally published in The Wordsmith's Forge on 4/4/09, then revised for reprint 6/23/11.
Caramel Apple Crumble
Ingredients:
2 Golden Delicious apples
4 small (or 2 large) Granny Smith apples
1/8 cup fruit juice
1/3 cup loosely packed light brown sugar
2 tablespoons butter
1/4 teaspoon ground ginger
12 soft caramel candies
1/2 cup quick rolled oats
1/2 cup flour
1/3 cup tightly packed light brown sugar
1/2 teaspoon ground ginger
1/3 cup butter
Directions:
Slice and core the apples, mixing the types together.
Pour the fruit juice into a large pot. Put about a third of the apple slices into the pot. Sprinkle with half the lightly packed brown sugar and dot with 1 tablespoon of butter. Add more apples and the remaining brown sugar and butter, and 1/4 teaspoon ground ginger.
Turn the heat on Low and simmer for a while. Stir apples occasionally, until they start to soften. The Golden Delicious will pretty much turn to mush, binding together the slices of Granny Smith. This takes about an hour or two, depending on the heat and the apples.
Meanwhile, cut the soft caramels into quarters.
Preheat the oven to 350ºF.
To prepare the crumble topping, stir together 1/2 cup quick rolled oats, 1/2 cup flour, 1/3 cup tightly packed light brown sugar, and 1/2 teaspoon ground ginger. Slice 1/3 cup butter and add to bowl, then cut it in with a butter cutter until the mixture is loose and crumbly.
Spray a ceramic or glass pie plate with cooking spray. Spoon in about a third of the apples and spread them on the bottom. Top with half the caramel pieces. Spoon in another third of the apples; top with the remaining caramel pieces. Spoon in the remaining apples and spread them smooth. Use another spoon to sprinkle the crumble topping evenly over the top of the apple filling.
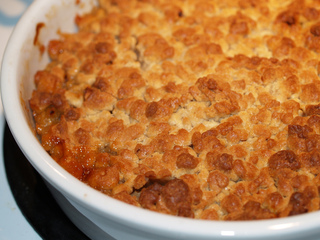
Bake for 20-30 minutes until filling is bubbly and topping melds into a lightly golden crust. Serve hot.
Notes:
The four Granny Smith apples were the tiniest of this type I’d ever seen. Normal ones are twice that size, hence the optional numbers.
Using two or more types of apples lets you take advantage of different textures and flavors. Unlike most dessert fillings, this one is firm rather than sloppy, thanks to the mushed Golden Delicious, the brown sugar, and the caramels.
You can peel the apples if you dislike peels in apple crumble. I didn’t peel mine.
The fruit juice should just cover the bottom of the saucepan so the apples don’t stick to it. I used pineapple-orange juice. Any similar breakfast juice, or apple or white grape juice, should work fine.
Precooking the raw apples makes it possible to have nice tender apples in the crumble without burning the crust. You could probably make big batches of partly cooked apples and freeze them for later use. Just don’t overcook them because they will cook more in the oven.
To quarter the caramels, cut in half once and then cut each part in half again. This is easier than trying to slice them several times.
This crumble was a huge hit with everyone. Our housemate had to leave right after supper and asked to have some left … otherwise it would all have been devoured. This recipe takes a bit more effort than the usual thaw-and-dump fillings I use in fruit crumbles, but it is totally worth it!
I meant to make this as a double-crust pie, but I forgot to buy pie crusts. The crumble version was so good that I may never bother to try a pie version.
This recipe was originally published in The Wordsmith's Forge on 3/30/09, then revised for reprint 6/23/11.
2 Golden Delicious apples
4 small (or 2 large) Granny Smith apples
1/8 cup fruit juice
1/3 cup loosely packed light brown sugar
2 tablespoons butter
1/4 teaspoon ground ginger
12 soft caramel candies
1/2 cup quick rolled oats
1/2 cup flour
1/3 cup tightly packed light brown sugar
1/2 teaspoon ground ginger
1/3 cup butter
Directions:
Slice and core the apples, mixing the types together.
Pour the fruit juice into a large pot. Put about a third of the apple slices into the pot. Sprinkle with half the lightly packed brown sugar and dot with 1 tablespoon of butter. Add more apples and the remaining brown sugar and butter, and 1/4 teaspoon ground ginger.
Turn the heat on Low and simmer for a while. Stir apples occasionally, until they start to soften. The Golden Delicious will pretty much turn to mush, binding together the slices of Granny Smith. This takes about an hour or two, depending on the heat and the apples.
Meanwhile, cut the soft caramels into quarters.
Preheat the oven to 350ºF.
To prepare the crumble topping, stir together 1/2 cup quick rolled oats, 1/2 cup flour, 1/3 cup tightly packed light brown sugar, and 1/2 teaspoon ground ginger. Slice 1/3 cup butter and add to bowl, then cut it in with a butter cutter until the mixture is loose and crumbly.
Spray a ceramic or glass pie plate with cooking spray. Spoon in about a third of the apples and spread them on the bottom. Top with half the caramel pieces. Spoon in another third of the apples; top with the remaining caramel pieces. Spoon in the remaining apples and spread them smooth. Use another spoon to sprinkle the crumble topping evenly over the top of the apple filling.
Bake for 20-30 minutes until filling is bubbly and topping melds into a lightly golden crust. Serve hot.
Notes:
The four Granny Smith apples were the tiniest of this type I’d ever seen. Normal ones are twice that size, hence the optional numbers.
Using two or more types of apples lets you take advantage of different textures and flavors. Unlike most dessert fillings, this one is firm rather than sloppy, thanks to the mushed Golden Delicious, the brown sugar, and the caramels.
You can peel the apples if you dislike peels in apple crumble. I didn’t peel mine.
The fruit juice should just cover the bottom of the saucepan so the apples don’t stick to it. I used pineapple-orange juice. Any similar breakfast juice, or apple or white grape juice, should work fine.
Precooking the raw apples makes it possible to have nice tender apples in the crumble without burning the crust. You could probably make big batches of partly cooked apples and freeze them for later use. Just don’t overcook them because they will cook more in the oven.
To quarter the caramels, cut in half once and then cut each part in half again. This is easier than trying to slice them several times.
This crumble was a huge hit with everyone. Our housemate had to leave right after supper and asked to have some left … otherwise it would all have been devoured. This recipe takes a bit more effort than the usual thaw-and-dump fillings I use in fruit crumbles, but it is totally worth it!
I meant to make this as a double-crust pie, but I forgot to buy pie crusts. The crumble version was so good that I may never bother to try a pie version.
This recipe was originally published in The Wordsmith's Forge on 3/30/09, then revised for reprint 6/23/11.
Deer-in-a-Thicket
INGREDIENT LIST
For the venison layer:
2 lbs. ground venison
2 eggs
1/2 cup half-and-half
1 small sweet onion, minced
almost 1 tube of saltine crackers
3 juniper berries
1/4 teaspoon black peppercorns
1/2 teaspoon sea salt
1 teaspoon fresh thyme
1/2 teaspoon fresh sage
1/4 teaspoon dried rosemary
For the pork sausage layer:
2 lbs. mild pork sausage
2 eggs
1/2 cup half-and-half
several handfuls asiago cheese crackers (about 3 cups crumbs)
1 teaspoon black peppercorns
1/2 teaspoon fresh sage
For the blackberry filling:
about 1 1/3 cups blackberries
2 teaspoons white sugar
Directions:
Preheat oven to 350º. This recipe will make two large loaves. Grease one or two loaf pans (depending whether you want to cook both loaves now or freeze one for later). Both the ground venison and the pork sausage should be thawed and room temperature.
In a mortar and pestle, crush 3 juniper berries and 1/4 teaspoon peppercorns. Add 1/2 teaspoon sea salt, 1 teaspoon fresh thyme, and 1/2 teaspoon fresh sage. Crumble 1/4 teaspoon dried rosemary needles with your fingers and add them. Mix all the spices together evenly.
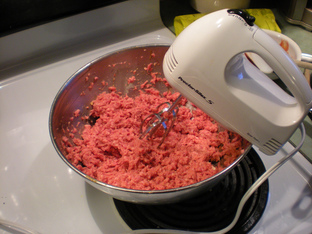
Put the ground venison in a large bowl. Add 2 eggs, 1/2 cup half-and-half, and minced onion. Crush most of a tube of saltine crackers and add them to the bowl. Mix everything together. It should have a firm, even consistency and stick together well enough that you can pick up the ball and turn it over in the bowl. If it’s too wet, add more crackers; if it’s too dry, add a little more half-and-half. When the consistency is right, add the spice blend and mix thoroughly. Set aside this bowl of venison mix.
Prepare the sausage in two separate 1 lb. batches. First, grind 1 teaspoon black peppercorns in a mortar and pestle. Divide the ground pepper into two small spice bowls. To each bowl, add 1/4 teaspoon fresh sage, cut fine with kitchen scissors.
Put several handfuls of asiago cheese crackers into a plastic bag and crush with a rolling pin until you have about 3 cups of crumbs. Divide the crumbs into two batches, about 1 1/2 cups each.
In a medium bowl, place 1 lb. mild pork sausage. Add 1 egg and 1/2 cup half-and-half. Add 1 1/2 cups asiago cheese cracker crumbs. Sprinkle in one bowl of the spices. Mix thoroughly. The pork sausage mixture will wind up slightly softer and stickier than the venison mixture. It should not be too sloppy to shape, though – add more cracker crumbs if necessary.
Lay out two large sheets of waxed paper. First, pick up the pork sausage mixture and set it onto one sheet of waxed paper. Shape it into an oval. Then gently press it into a large flat rectangle, using the palms of your hands to shape it and spread it out as much as possible. The rectangle should get between 1/4 and 1/2 inch thick. It needs to be big because this will be the outer layer.
Next, divide the venison mixture in half. Pick one half of the venison mixture and set it onto the second sheet of waxed paper. Shape it into an oval. Then gently press it into a small flat rectangle, using the palms of your hands to shape it and spread it out. The rectangle should get about 1 inch thick. Now use your knuckles to press an indentation into the center of the rectangle across the short length (you will be picking up the short ends to make the roll) but not quite touching the two long edges.
Into that central indentation, place about 2/3 cup blackberries. Sprinkle with about 1 teaspoon white sugar.
Pick up the ends of the waxed paper under the venison mixture and gently lift them towards each other, forming the venison into a roll around the blackberries. Move your hands down the waxed paper, squeezing the top of the roll together. Carefully peel apart the waxed paper. Now use your hands to finish sealing the seam along the top of the venison roll. You should have a smooth tube of venison with the ends slightly open. Make sure the blackberries are well stuffed inside, then gently press together each end of the tube, forming a smooth loaf of venison. Gently press your hands around the ends, sides, and top to make it all secure.
Place your dominant hand on top of the venison loaf. With your nondominant hand, pick up the waxed paper on that same side. Carefully lift it, tipping the venison loaf (seam side to your palm) into your dominant hand. Peel away the waxed paper and quickly transfer the venison loaf onto the large rectangle of pork sausage, laying the venison loaf (seam side down) across the middle of the rectangle shortwise so that the ends of the loaf touch the long sides of the rectangle (you will be picking up the short ends to make the roll).
Pick up the ends of the waxed paper under the pork sausage and gently lift them towards each other, forming the pork sausage into a roll around the venison. Move your hands down the waxed paper, squeezing the top of the roll together. Carefully peel apart the waxed paper. Now use your hands to finish sealing the seam along the top of the pork sausage roll. You should have a smooth tube of pork sausage with the ends slightly open. Make sure the venison is well stuffed inside, then gently press together each end of the tube, forming a smooth loaf of sausage. Gently press your hands around the ends, sides, and top to make it all secure.
Set a large, greased loaf pan next to the completed pork sausage loaf. Place your dominant hand on top of the pork sausage loaf. With your nondominant hand, pick up the waxed paper on that same side. Carefully lift it, tipping the pork sausage loaf (seam side to your palm) into your dominant hand. Peel away the waxed paper and, using both hands, quickly transfer the pork sausage loaf to the loaf pan (seam side down). Gently use your hands to smooth the top of the loaf if necessary.
Combine the remaining ingredients to make the second batch of pork sausage mixture in the same manner as the first. Follow the same assembly directions to create the second loaf.
Bake at 350º for about 1 hour 15 minutes. A single 2-lb. deer-in-a-thicket usually cooks in a little over hour; cooking two in the same oven can make it take longer. The juices should run clear when the done; test by sticking a knife in through the two layers of meat (but not into the berry filling or it will bleed all over).
Remove deer-in-a-thicket from the oven and place on a cooling rack. Allow 5-10 minutes for cooling before cutting into the loaf. You will probably need a knife, pie server, and spoon to serve this because it tends to fall apart when cut.
Notes:
It is much easier to make this recipe with two or three people: one to mix things into the ground meat by hand, and one or two to measure ingredients and crush the crackers, etc. I wouldn’t want to try making this one all alone.
The spices in this recipe are fine-tuned for venison. The pork sausage provides a rich fatty jacket so the lean venison doesn’t dry out and burn. Similar game meat such as elk or moose might work as substitutes; domestic meat such as beef or lamb would do better with a different spice blend, but lamb and pork would probably make a tasty combination.
I happened to have several tubes of mild pork sausage in the freezer, so I used that and simply spiced it up. The result was a moderate pork sausage. Next time I will probably double the amount of pepper added to the sausage – or else buy some hot pork sausage. Adapt according to your own tastes. The idea is to have a hot spicy pork layer surrounding a mild venison layer, since the hot spices in the pork represent the “thorns” of the “thicket” in which the deer is hiding. The blackberries, of course, have already been “swallowed” by the deer!
Plain saltine crackers are preferred for the venison layer, although you can experiment with flavored crackers if you wish. The pork sausage layer needs a sharp flavored cracker. I happened to have asiago cheese crackers on hand. If I were buying crackers, however, I’d prefer something with black pepper, such as the cracked pepper Triscuits. Feel free to experiment with different crackers.
I knead my meatloaf ingredients by hand. Some people use a spoon or a mixer. For this recipe, there’s not much point to the latter, since it absolutely must be assembled by hand – you are just going to get your hands sticky. Ideally you should have some prior experience making rolled or layered meatloaves, because the assembly is kind of challenging.
You can cook both loaves at once, or wrap one to freeze for later. One loaf will feed 4-6 people, especially with side dishes. The combination of venison, pork sausage, and assorted fillers makes for a very filling meatloaf. This would make a splendid feast food for special occasions.
This recipe was originally published in The Wordsmith's Forge on 9/4/09, and revised for reprint 6/23/11.
For the venison layer:
2 lbs. ground venison
2 eggs
1/2 cup half-and-half
1 small sweet onion, minced
almost 1 tube of saltine crackers
3 juniper berries
1/4 teaspoon black peppercorns
1/2 teaspoon sea salt
1 teaspoon fresh thyme
1/2 teaspoon fresh sage
1/4 teaspoon dried rosemary
For the pork sausage layer:
2 lbs. mild pork sausage
2 eggs
1/2 cup half-and-half
several handfuls asiago cheese crackers (about 3 cups crumbs)
1 teaspoon black peppercorns
1/2 teaspoon fresh sage
For the blackberry filling:
about 1 1/3 cups blackberries
2 teaspoons white sugar
Directions:
Preheat oven to 350º. This recipe will make two large loaves. Grease one or two loaf pans (depending whether you want to cook both loaves now or freeze one for later). Both the ground venison and the pork sausage should be thawed and room temperature.
In a mortar and pestle, crush 3 juniper berries and 1/4 teaspoon peppercorns. Add 1/2 teaspoon sea salt, 1 teaspoon fresh thyme, and 1/2 teaspoon fresh sage. Crumble 1/4 teaspoon dried rosemary needles with your fingers and add them. Mix all the spices together evenly.
Put the ground venison in a large bowl. Add 2 eggs, 1/2 cup half-and-half, and minced onion. Crush most of a tube of saltine crackers and add them to the bowl. Mix everything together. It should have a firm, even consistency and stick together well enough that you can pick up the ball and turn it over in the bowl. If it’s too wet, add more crackers; if it’s too dry, add a little more half-and-half. When the consistency is right, add the spice blend and mix thoroughly. Set aside this bowl of venison mix.
Prepare the sausage in two separate 1 lb. batches. First, grind 1 teaspoon black peppercorns in a mortar and pestle. Divide the ground pepper into two small spice bowls. To each bowl, add 1/4 teaspoon fresh sage, cut fine with kitchen scissors.
Put several handfuls of asiago cheese crackers into a plastic bag and crush with a rolling pin until you have about 3 cups of crumbs. Divide the crumbs into two batches, about 1 1/2 cups each.
In a medium bowl, place 1 lb. mild pork sausage. Add 1 egg and 1/2 cup half-and-half. Add 1 1/2 cups asiago cheese cracker crumbs. Sprinkle in one bowl of the spices. Mix thoroughly. The pork sausage mixture will wind up slightly softer and stickier than the venison mixture. It should not be too sloppy to shape, though – add more cracker crumbs if necessary.
Lay out two large sheets of waxed paper. First, pick up the pork sausage mixture and set it onto one sheet of waxed paper. Shape it into an oval. Then gently press it into a large flat rectangle, using the palms of your hands to shape it and spread it out as much as possible. The rectangle should get between 1/4 and 1/2 inch thick. It needs to be big because this will be the outer layer.
Next, divide the venison mixture in half. Pick one half of the venison mixture and set it onto the second sheet of waxed paper. Shape it into an oval. Then gently press it into a small flat rectangle, using the palms of your hands to shape it and spread it out. The rectangle should get about 1 inch thick. Now use your knuckles to press an indentation into the center of the rectangle across the short length (you will be picking up the short ends to make the roll) but not quite touching the two long edges.
Into that central indentation, place about 2/3 cup blackberries. Sprinkle with about 1 teaspoon white sugar.
Pick up the ends of the waxed paper under the venison mixture and gently lift them towards each other, forming the venison into a roll around the blackberries. Move your hands down the waxed paper, squeezing the top of the roll together. Carefully peel apart the waxed paper. Now use your hands to finish sealing the seam along the top of the venison roll. You should have a smooth tube of venison with the ends slightly open. Make sure the blackberries are well stuffed inside, then gently press together each end of the tube, forming a smooth loaf of venison. Gently press your hands around the ends, sides, and top to make it all secure.
Place your dominant hand on top of the venison loaf. With your nondominant hand, pick up the waxed paper on that same side. Carefully lift it, tipping the venison loaf (seam side to your palm) into your dominant hand. Peel away the waxed paper and quickly transfer the venison loaf onto the large rectangle of pork sausage, laying the venison loaf (seam side down) across the middle of the rectangle shortwise so that the ends of the loaf touch the long sides of the rectangle (you will be picking up the short ends to make the roll).
Pick up the ends of the waxed paper under the pork sausage and gently lift them towards each other, forming the pork sausage into a roll around the venison. Move your hands down the waxed paper, squeezing the top of the roll together. Carefully peel apart the waxed paper. Now use your hands to finish sealing the seam along the top of the pork sausage roll. You should have a smooth tube of pork sausage with the ends slightly open. Make sure the venison is well stuffed inside, then gently press together each end of the tube, forming a smooth loaf of sausage. Gently press your hands around the ends, sides, and top to make it all secure.
Set a large, greased loaf pan next to the completed pork sausage loaf. Place your dominant hand on top of the pork sausage loaf. With your nondominant hand, pick up the waxed paper on that same side. Carefully lift it, tipping the pork sausage loaf (seam side to your palm) into your dominant hand. Peel away the waxed paper and, using both hands, quickly transfer the pork sausage loaf to the loaf pan (seam side down). Gently use your hands to smooth the top of the loaf if necessary.
Combine the remaining ingredients to make the second batch of pork sausage mixture in the same manner as the first. Follow the same assembly directions to create the second loaf.
Bake at 350º for about 1 hour 15 minutes. A single 2-lb. deer-in-a-thicket usually cooks in a little over hour; cooking two in the same oven can make it take longer. The juices should run clear when the done; test by sticking a knife in through the two layers of meat (but not into the berry filling or it will bleed all over).
Remove deer-in-a-thicket from the oven and place on a cooling rack. Allow 5-10 minutes for cooling before cutting into the loaf. You will probably need a knife, pie server, and spoon to serve this because it tends to fall apart when cut.
Notes:
It is much easier to make this recipe with two or three people: one to mix things into the ground meat by hand, and one or two to measure ingredients and crush the crackers, etc. I wouldn’t want to try making this one all alone.
The spices in this recipe are fine-tuned for venison. The pork sausage provides a rich fatty jacket so the lean venison doesn’t dry out and burn. Similar game meat such as elk or moose might work as substitutes; domestic meat such as beef or lamb would do better with a different spice blend, but lamb and pork would probably make a tasty combination.
I happened to have several tubes of mild pork sausage in the freezer, so I used that and simply spiced it up. The result was a moderate pork sausage. Next time I will probably double the amount of pepper added to the sausage – or else buy some hot pork sausage. Adapt according to your own tastes. The idea is to have a hot spicy pork layer surrounding a mild venison layer, since the hot spices in the pork represent the “thorns” of the “thicket” in which the deer is hiding. The blackberries, of course, have already been “swallowed” by the deer!
Plain saltine crackers are preferred for the venison layer, although you can experiment with flavored crackers if you wish. The pork sausage layer needs a sharp flavored cracker. I happened to have asiago cheese crackers on hand. If I were buying crackers, however, I’d prefer something with black pepper, such as the cracked pepper Triscuits. Feel free to experiment with different crackers.
I knead my meatloaf ingredients by hand. Some people use a spoon or a mixer. For this recipe, there’s not much point to the latter, since it absolutely must be assembled by hand – you are just going to get your hands sticky. Ideally you should have some prior experience making rolled or layered meatloaves, because the assembly is kind of challenging.
You can cook both loaves at once, or wrap one to freeze for later. One loaf will feed 4-6 people, especially with side dishes. The combination of venison, pork sausage, and assorted fillers makes for a very filling meatloaf. This would make a splendid feast food for special occasions.
This recipe was originally published in The Wordsmith's Forge on 9/4/09, and revised for reprint 6/23/11.
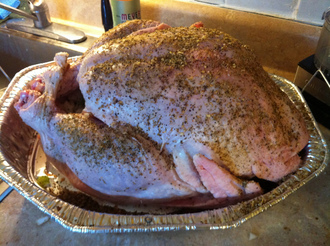
Delectable Turkey of Gratitude
Ingredients:
1 (9-pound) whole turkey, thawed
1/4 cup olive oil
1 teaspoon dried thyme
1 teaspoon dried tarragon
1 tablespoon dried rosemary
1 teaspoon fine sea salt
1/2 teaspoon freshly ground black pepper
1 lemon, quartered
1 medium red onion, quartered
Directions:
Preheat roaster oven to 325ºF.
To make the herbal rub: In a small bowl, combine the olive oil, thyme, tarragon, rosemary, salt, and pepper.
Remove giblets and neck from turkey; reserve for gravy or stock if desired. Wash the turkey in cold water, then pat dry.
Use fingertips to loosen the skin from the breast (without removing skin entirely) and spread about a tablespoon of the herbal rub on the meat under the skin. Spread more of the rub inside the neck and body cavities. Apply the remaining rub to the entire outside of the turkey.
Cut the onion and the lemon into quarters. Stuff the quarters into the body and neck cavities. (Usually one lemon quarter will fit in the neck cavity, and the rest in the body.)
Secure the neck skin to the back with toothpicks. Fold the wing tips under the turkey’s back. Tuck or bind the legs in place. (The turkey may be prepared to this point, then covered and stored in the refrigerator for several hours.)
Place turkey, breast side up, on the rack and lower into the roaster. Insert a meat thermometer into the thickest part of the thigh, taking care to avoid the bones.
Roast the turkey in a preheated 325ºF roaster oven for about 2-1/2 hours (15-20 minutes per pound). Baste turkey every half-hour. If there are not enough pan juices at first, use an extra tablespoon or two of olive oil for basting. When the turkey is browned as much as you want, cover it with a loose tent of aluminum foil to prevent over-browning; lift foil to baste. Continue to roast turkey until the meat thermometer reads 165ºF. in the thigh.
Turn roaster off and remove lid; allow turkey to sit for about 5 minutes. Using the rack, lift turkey from oven; set rack and turkey onto a platter and allow to rest for 10 more minutes. Remove rack, position turkey on platter, and carve. Makes about 10 servings.
Notes:
This recipe should work for any small to medium turkey, cooking for 15-20 minutes per pound. A whole turkey feeds slightly more than 1 person/pound.
Turkey meat is not terrifically juicy to begin with and dries out easily. Food manufacturers often attempt to solve this by lacing turkey with salt water, various fats, and other additives. The olive oil in this recipe keeps the turkey moist, improves flavor, and is health-friendly. The frequent basting also helps.
Ordinary savory stuffing (based on breads or grains) packed in a raw turkey can impede the cooking of both the stuffing and the turkey. Instead, pack the raw turkey with chunks of juicy fruits or vegetables which can be discarded later; this adds moisture and flavor while helping the bird keep its shape. Savory stuffing can be packed into the cavity before serving the turkey.
Turkey is usually served by carving the meat off the bones, so at the end of the meal, you have most of a carcass left on the platter. Pick the remaining meat off the bones and store it for use in sandwiches, dumplings, or other recipes. Do not leave a turkey at room temperature for hours on end; lukewarm meat can grow germs. Process leftovers and put them away promptly after the meal.
Save the turkey bones, skin, and attached scraps for making stock. A whole turkey carcass will fit into a large crock pot and is enough to make one batch of turkey stock. Add the giblets if you didn’t use those for gravy. If you have leftover vegetables, dump those in too; otherwise you can use some fresh onions, carrots, peas, etc. for extra flavor. Add water almost to the brim of the crock, cover, and cook on Low for 8-12 hours. Strain out the solids, then put the stock in containers and freeze for later use.
This recipe was originally published in Whispering Grey Matters, December 2006. It was later revised for reprint in The Wordsmith's Forge on 11/17/09, and for reprint here on 6/23/11.
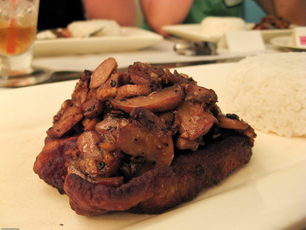
Pork Steak with Apples
Ingredients:
2 pounds of pork steaks, thawed
1/4 teaspoon Muntok white peppercorns
1/4 teaspoon Madagascar green peppercorns
1/4 teaspoon Hawaiian red salt
1/4 teaspoon clove powder
1/2 teaspoon dried lemon thyme
1/4 cup apple butter
1/4 cup apple cider
1 teaspoon red wine vinegar
Granny Smith apples (4 small or 2 large)
1 small sweet onion
1 can chicken broth
1 canful apple cider
pinch Hawaiian red salt to taste
ground Muntok white pepper to taste
Directions:
In a mortar, combine 1/4 teaspoon Muntok white peppercorns, 1/4 teaspoon Madagascar green peppercorns, and 1/4 teaspoon Hawaiian red salt. Crush together. Add 1/4 teaspoon clove powder and 1/2 teaspoon dried lemon thyme. Stir.
Pour the spice mixture into a small bowl. Add 1/4 cup apple butter, 1/4 cup apple cider, and 1 teaspoon red wine vinegar. Mix thoroughly. This marinade should be thick enough to cling to a pastry brush but not too pasty; adjust proportions if necessary.
Use the pastry brush to coat both sides of each pork steak. Stack the steaks in a shallow container. Pour any remaining marinade over the top of the steaks. Put the lid on the container and allow to marinate in the refrigerator overnight.
Slice the apples and remove the cores. Put the apple slices in a large bowl. Peel the onion. Slice it and separate the slices into sections. Mix together the pieces of apple and onion.
Remove the pork steaks from the refrigerator. Put one pork steak in the bottom of the crock pot. Put a double-handful of apple and onion slices over the pork steak. Continue layering until you run out of ingredients. Pour the can of chicken broth into the bottom of the crock pot. Fill the same can with apple cider and pour that in too. Sprinkle a pinch of Hawaiian red salt over the contents of the crock pot. Grind a bit of Muntok white pepper over everything.
Turn crock pot on “Low,” cover, and cook for four or more hours. After the apple and onion slices start to soften and release their juices, use a spoon to stir them around some and scoop the broth over the pork steaks. The dish is done when the apple and onion slices are soft, and the pork steaks come apart easily.
Notes:
Pork steak is a cheap cut of pork. It benefits from long, slow cooking. The marinade helps make it tender and the broth keeps it moist. My package had three steaks in it, so I put one on the bottom of the crock pot, then a layer of apple/onion, one steak in the middle, the rest of the apple/onion, and the last steak on top.
Granny Smith is a popular type of cooking apple. These apples have bright green skin and crisp white flesh. They are sour, but they hold their shape and flavor well even when cooked for a long time. Usually they are huge – up to softball size – but this time I could only find little ones. You could substitute some other variety of cooking apple. Use what you have.
Fancy types of salt and pepper add to the character of a dish. Muntok white pepper has a mellow, mild flavor and Madagascar green pepper has a fresh spicy flavor with fruity notes. Hawaiian red salt has iron-rich clay added to it, which gives a subtle yet rich earth-metallic note to meat. It is especially favored for use with pork.
Red wine vinegar has a dark fruity flavor. Apple cider vinegar would also work well in this recipe; I just didn’t have any.
In the end, this dish came out quite well, savory and tangy and a little sweet. The pork steaks are tender, though not quite as much as when they’re made with mango marinade: the apple-marinated steaks will cut with a fork along the grain, but to cut across the grain takes a table knife.
This recipe was originally published in The Wordsmith's Forge on 9/13/08, then revised for reprint 6/23/11.
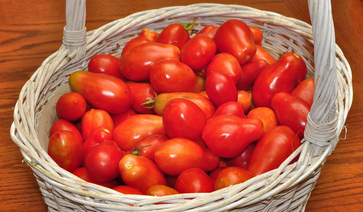
Roma Tomato Sauce
Ingredients:
8 lbs. Roma tomatoes
1/4 cup olive oil
1/2 red onion
1/2 bell pepper
1 teaspoon dried thyme
1 teaspoon rubbed sage
2 teaspoons basil flakes
2 teaspoons dried oregano
2 teaspoons sweet marjoram
1 bay leaf
1 teaspoon coarse Australian pink salt
1/2 teaspoon ground black pepper
1/2 teaspoon garlic paste
12 oz. tomato paste
3/4 cup brown sugar
Directions:
Dice the Roma tomatoes and put them in a large bowl. Pour 1/4 cup olive oil into a large crock pot. Add the diced tomatoes. Turn crock pot on Low and cover it.
Peel and dice the onion. Remove seeds and ribs from half a bell pepper and dice the pepper. Add the diced onion and diced pepper to the crock pot. Stir.
Cook on Low for 3-4 hours until tomatoes soften.
In a small bowl, combine 1 teaspoon dried thyme, 1 teaspoon rubbed sage, 2 teaspoons basil flakes, 2 teaspoons dried oregano, and 2 teaspoons sweet marjoram. Mix together, then add to the crock pot and stir.
Add 1 bay leaf, 1 teaspoon coarse Australian pink salt, and 1/2 teaspoon ground black pepper to the crock pot. Stir. Add 1/2 teaspoon garlic paste and stir.
Continue cooking for another hour or two until the sauce begins to thicken.
Stir and taste the sauce. Add 12 oz. tomato paste. Stir until thoroughly blended. Taste again. The spaghetti sauce will probably be sour. Add about 3/4 cup brown sugar (more or less to taste) and stir. Allow to cook for another hour or so, stirring and tasting more frequently. Fine-tune the flavors if needed.
Remove bay leaf. Serve fresh, or pour into containers and freeze.
Notes:
Roma tomatoes are intended for making sauces, so they cook down nicely. Any red sauce-type tomato should work in this recipe, but Roma is the most common.
I typically use full-flavor olive oil (often imported) for cooking. If you don’t care for strong olive oil, use a bland variety.
When dicing tomatoes for spaghetti sauce, make the pieces slightly larger than you want. They’ll cook down some. This recipe makes a thick, chunky sauce.
If you don’t have dried herbs, you can substitute fresh leaves. Put in the same amount and taste, but you'll probably need about twice as much.
Use plain tomato paste if possible, to avoid conflicting spices. I used a can of Great Value (“Ingredients: tomato pulp.”) here.
Australian pink salt is a gourmet salt with a mild mineral flavor, not as strong as Hawaiian red salt. It goes well with tomatoes and other sauces. If you don’t have it, use sea salt or table salt. If using fine salt, use about half as much, then taste.
This sauce is more susceptible to overcooking than some other spaghetti sauces I have made, probably because it's made entirely with sauce tomatoes and extra paste. It is unlikely to need skimming to remove excess juices. Take care during the last few hours as it thickens.
This recipe was originally published in The Wordsmith's Forge on 8/18/10, then revised for reprint 6/23/11.
Photos used under Creative Commons from meaduva, FotoosVanRobin, Kasia/flickr, Adventures of Pam & Frank, ilovememphis, dbgg1979, jeffreyw
